Tutorial: JupyterLab Analytics on Google Cloud Platform
The $300 worth of credits seemed like a good reason to try out Google Cloud Platform for my prototype analytics stack. This is tutorial on how to set that up.
This post describes what I did to get JupyterLab up and running on GCP. If I’ve done something stupid, please let me know.
Create an account and start a new project
First I signed up for a new GCP account. With the account validated I can begin provisioning compute resources, but not without creating a new Project first. GCP seems to be organised around Projects.
I created a new project by visiting the resource management page and clicking on the ‘+ create project’ button in the top banner.

I was tripped up a little at first because I hadn’t properly linked the new project to an enabled Billing account. I found this page helpful in getting through this.
A few minutes after clicking ‘create’ a notification appeared telling me that the new project had been created. Clicking on that notification took me to the dashboard of my new project where I could start provisioning resources.
Setting up a Virtual Machine
To me the most obvious way to run a notebook server seemed to be to set up a dedicated Virtual Machine (VM) as I wanted a high level of control over the installation of my analytics stack and to understand all the components. I have since seen tutorials from Google showing other ways to setup notebooks up using a Cloud Dataproc cluster but I haven’t tried that yet. I’d be interested in the advantages of other approaches like this.
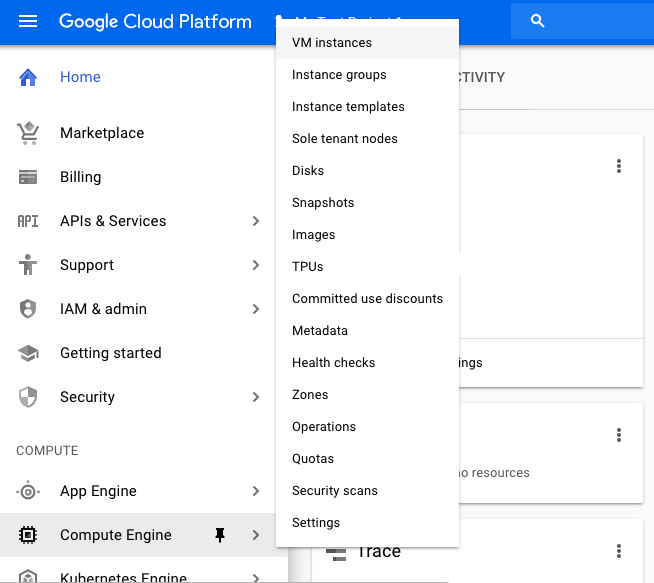
To create an instance I used the menu on the left hand side of the dashboard to find Compute Engine → VM Instances → Create New.
I don’t anticipate using any multi threaded Python at this stage but I would like to fit datasets into memory easily. I also intend to store notebooks and data on a separate disk to the VM boot disk. My existing notebooks make use of Python 3.6 features so I preferred an image that has that as the default system python. To achieve this setup I kept all of the default VM settings except:
Machine Type — 2 vCPUs, 13Gb Memory.
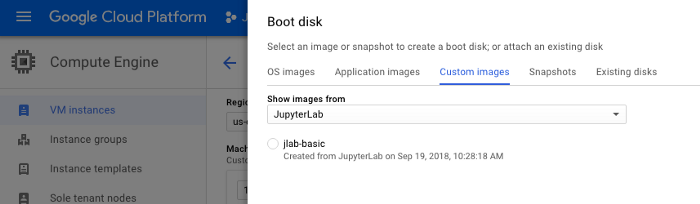
Image — Ubuntu 18.04 LTS
Disks — Expanding the Manangement, security, disks, networking, sole tenancy panel and selecting the Disks tab I added a new blank disk that I will format from the command line later.
Networking→ External IP: change ephemeral to permanent IP.
A few moments after clicking create the new VM was up and running…
Getting onto the box
Now it was time get onto the box and start installing my favourite analytics tools. At this point I downloaded the gcloud command line tool, following the instructions here (I’m on macOS).
Once installed I could ssh onto the box using:
$ gcloud compute ssh instance-1
All the authentication configuration was taken care of (or not) in the gcloud init steps. I ended up enabling OS Login to avoid gcloud logging into the instance as my local user, but perhaps this was unnecessary.
Setting up a data disk separate from boot disk
I followed these instructions to prepare the additional disk that I attached to this VM. After confirming the disk is /dev/sdb using the command sudo lsblk, I formatted the disk. Obviously don’t do this formatting if you attach an existing disk rather than creating a new one!
$ sudo mkfs.ext4 -m 0 -F -E lazy_itable_init=0,lazy_journal_init=0,discard /dev/sdb
I created a mount point and mounted the disk. I’d like not to do this every time I restart the VM so I used the following lines to fix that by modifying etc/fstab.
$ sudo mkdir -p /data
$ sudo mount -o discard,defaults /dev/sdb /data
$ sudo chmod a+w /data$ sudo cp /etc/fstab /etc/fstab.backup
$ echo UUID=`sudo blkid -s UUID -o value /dev/sdb` /data ext4 discard,defaults,nofail  2 | sudo tee -a /etc/fstab
This is the space that I intend to use to store notebook and data files. We’ll come back to this directory later.
Set up JupyterLab
After struggling with virtual environments in previous projects I decided to give [pipenv](https://github.com/pypa/pipenv) a try.
$ pip3 install --user pipenv
Then I used pipenv to install my ‘essential’ packages. First I created a new folder for my test project and then asked pipenv to create an environment.
$ mkdir /data/test_project; cd /data/test_project$ pipenv install jupyterlab pandas numpy altair vega_datasets
I had to do a little more work before I could start jupyterlab and be able to see the Jupyter server from the outside world.
Allow access to the notebook from the outside world
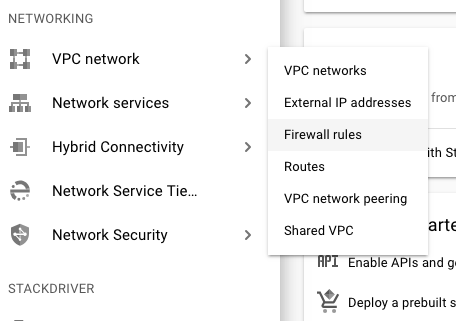
First I had to create a new firewall rule to allow incoming connections on the port ranges used by my notebooks. I did this through the GCloud console Networking → VPC Network → Firewall rules.
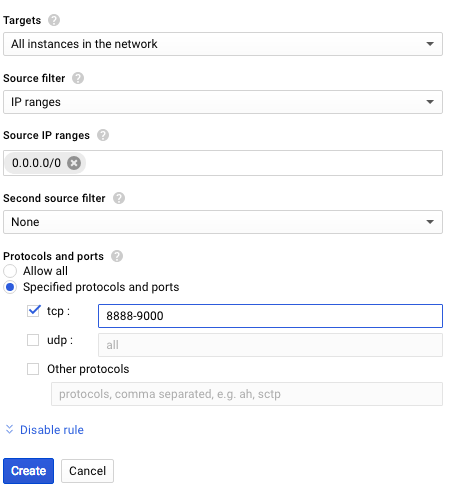
In the dialog I entered a name and then allowed traffic on the port range 8888–9000. These rules apply across the project and not just for this VM.
It’s also possible to create new firewall rules from the console using the gcloud tool.
The second set of changes was to the configuration of the notebook server to allow it to accept connections with origin other than localhost. First, I generated a config file and then opened it in a text editor.
$ jupyter-lab --generate-config
$ nano $HOME/.jupyter/jupyter_notebook_config.py
I found the following lines (that were commented out in the default file) and modified them as follows:
c.NotebookApp.allow_origin = ‘*’
c.NotebookApp.allow_remote_access = True
c.NoteBookApp.open_browser = False
Start up Jupyter Lab and test access
Now it was finally time to fire up Jupyter Lab see if I could point my browser to it.
To start jupyter lab first activate pipenv shell. I tend to use screen to keep the server alive in the case my ssh session dies. I guess people will tell me I should use tmux.
$ pipenv shell
$ screen
$ jupyter lab...Copy/paste this URL into your browser when you connect for the first time,
    to login with a token:
        http://(instance-1 or 127.0.0.1):8888/?token=6a93b7c10a044b519c282870e49010b9147e923302cda3f87
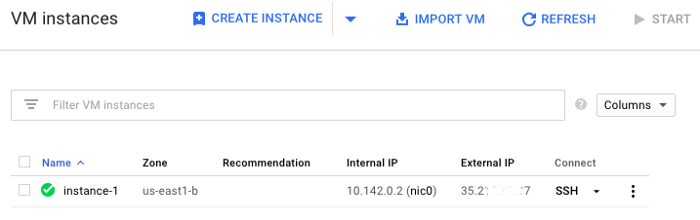
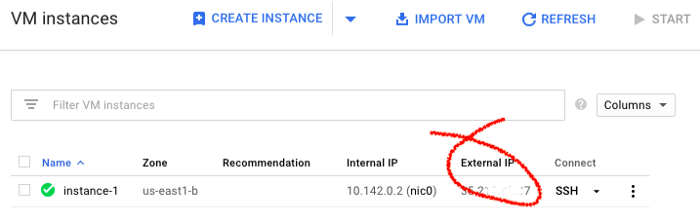
Following the instructions given by Jupyter I copy/pasted the url into my browser, remembering to change (instance-1 or 127.0.0.1) for the external IP address assigned to my VM, which can be found in the console VM Instances.
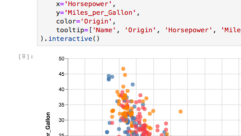
Yay, it worked! Let’s check pipenv installed those packages correctly and try to draw a chart with Altair.
Creating an image of this machine
Phew, this has been quite a long process. I decided to create an image of this box at this point so that I can start up similar VMs more quickly.
To do this I followed these instructions. This bascially boiled down to stopping the instance and then using the gcloud tool:
gcloud compute images create test_img --source-disk SOURCE_DISK
So if I want to create a new VM (perhaps with upgraded specs) I can select the image I created here to have that machine set up exactly like this one. Sweet.
That was fun. Let’s see how quickly I burn through those credits!
Cover Photo by Mitchell Luo on Unsplash